HOW TO ENTER CHARGES OF INPATIENT
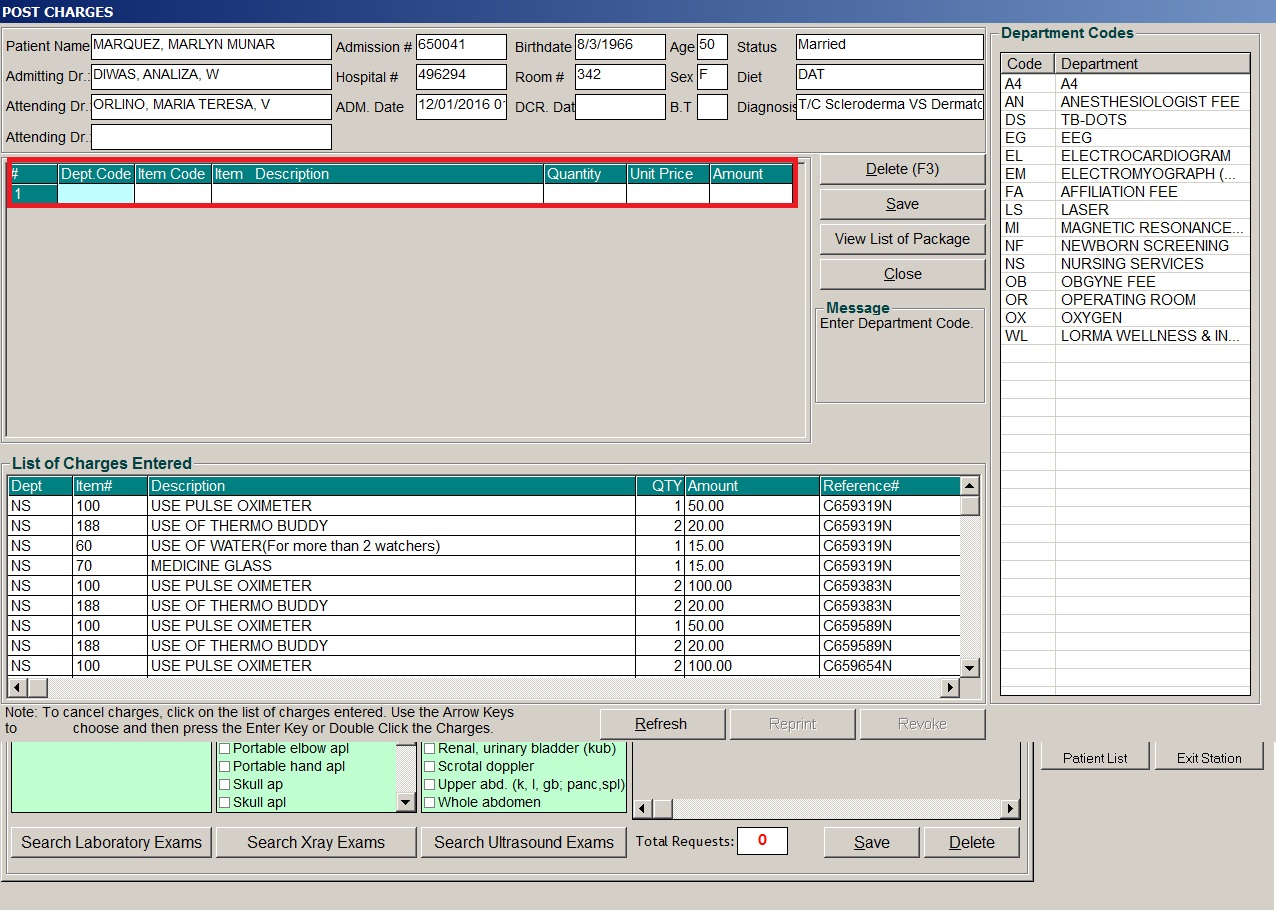
Step 3: When clicked, the Post Charges Window will be displayed. Complete the following data:
NOTE: To select from the list, double-click on the desired item or click on the desired item then click on Select button. Clicking on Cancel button will abort the selection.
1. Department Code - Refer to the list of department codes written at the bottom of the window.
2. Item Code - Type the service code or first letters of the service name then press Enter key. Or you can press Enter key if item code is still blank. When pressed, the Revenue Code window will be displayed showing all revenue codes.
3. Item Description - Automatically filled-up by the program in reference with the selected item
4. Quantity - Automatically filled up by the program in reference with the selected item but this can still be edited.
5. Unit Price - Automatically filled up by the program in reference with the selected item.
6. Amount - Automatically filled up by the program in reference with the selected item and its quantity.
Step 4: After entering the items to be charged, the user can do the following options.
* Click on Save button to save entered items. When clicked, a printable form will be displayed. Click on the printer icon to print. Entered items will be automatically charged to the patient’s bill.
* To remove the selected item, click on the desired item then click on Delete button.
* Clicking on Exit button will close the Post Charge window.
Step 5: At the bottom of the window, the user can also do the following options.
To view list of charges entered, click on List of Charges Entered button.
* To cancel requested charges, double-click on the requested item or click on the desired item then click on Cancel Charges button.
* To have a copy of charge slip of the requested item, click on Re-print Charge Slip button.